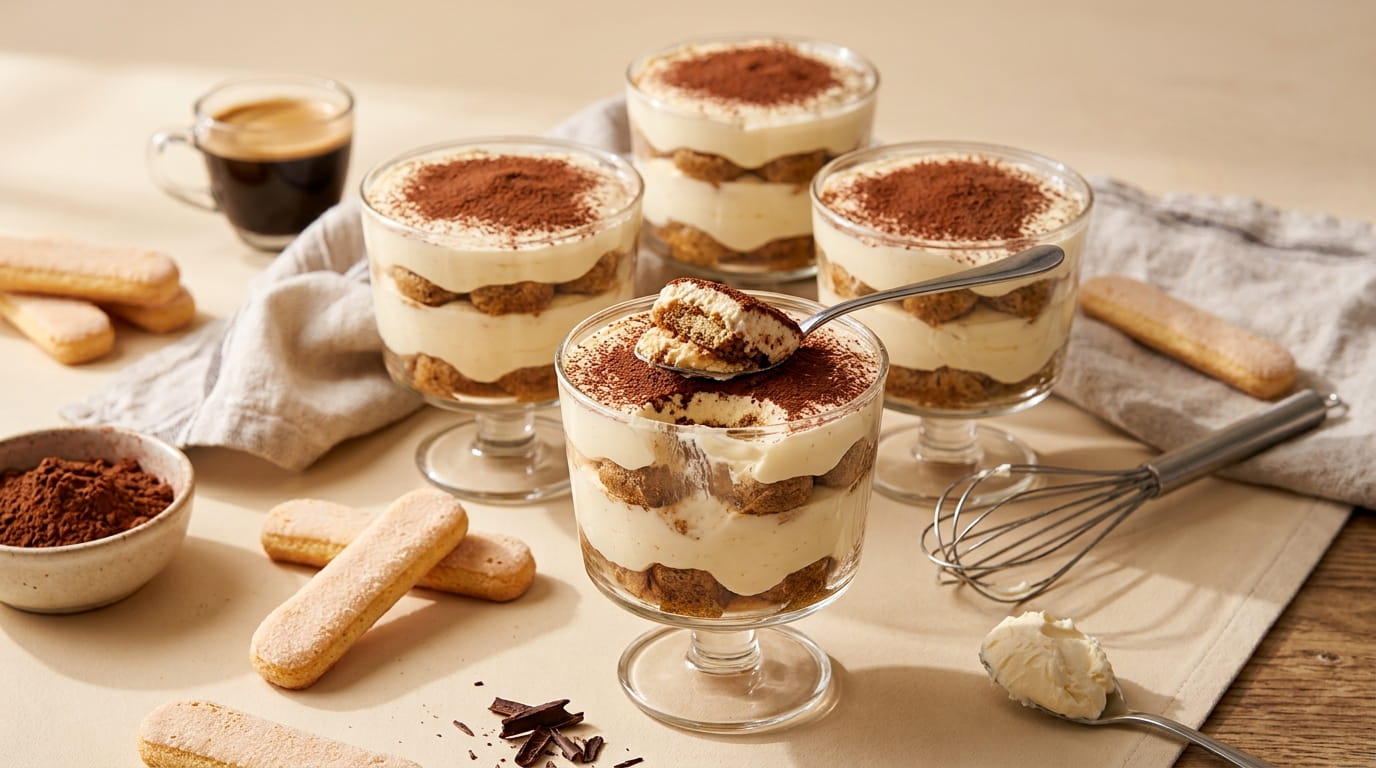
Tiramisu has a reputation for being a restaurant dessert, something you order out rather than make at home. Most of that comes down to the full tray version, which feels like a commitment before you’ve even bought the ingredients.
Tiramisu dessert cups solve that entirely. Same layers, same flavor, built one portion at a time in a glass instead of assembled in a pan you then have to slice cleanly. Nothing goes in the oven, and the whole thing comes together in about twenty minutes of actual work before it goes in the fridge to chill.
This list walks through fifteen details that make the difference between a cup that tastes homemade and one that tastes like it came from somewhere nice. Some are about technique, like how long to dip the ladyfingers. Others solve specific problems, like mascarpone cream that won’t thicken properly.
If you’ve been intimidated by tiramisu, individual cups are the easiest place to start. There’s no slicing, no serving dish to worry about, and every portion looks the way you intended.
1. Skip the Full Tray and Build in Individual Cups

A full pan of tiramisu means careful slicing, layers that shift when you serve, and a first portion that looks better than the last one. Individual cups remove all of that in one decision.
💡 Quick Tip
Break ladyfingers into pieces to fit your cup size instead of forcing whole ones to fit the curve.
Portioning also makes this dessert easier to scale. Six cups or twelve takes the same effort once the cream is made.
2. Choose the Right Ladyfingers for Dipping
Not every ladyfinger handles coffee the same way, and the type you buy affects how quickly the biscuit softens once it hits liquid. The dry, crisp Italian style holds up best in a layered dessert.
Look for savoiardi in the international aisle or near the cookies. They’re usually in a long, flat box.
3. Dip the Ladyfingers Fast, Not Long
The most common tiramisu mistake happens in about two seconds. Holding a ladyfinger in coffee until it feels saturated means it will collapse into mush by the time the dessert chills.
Biscuit falls apart, layers turn into a wet, muddy texture.
Biscuit softens in the fridge, holds a distinct layer.
One second per side is genuinely enough. The biscuit keeps absorbing moisture from the cream while it chills.
4. Make the Mascarpone Layer Without Curdling It

Mascarpone splits when it’s overworked or when cold cream hits it too fast. Both problems come from the same place, which is treating it like regular whipped cream instead of a soft cheese.
Let the mascarpone sit out for about 15 minutes to soften slightly.
Whip the heavy cream separately until it holds soft peaks.
Fold the cream into the mascarpone gently, in two or three additions.
Stop folding the moment it looks smooth. A few extra turns is all it takes to break the texture.
5. Use Strong Coffee, Not Regular Brewed
Regular drip coffee tastes weak once it’s absorbed into a biscuit and layered under sweet cream. The coffee flavor needs to be concentrated enough to still register after everything else is in the cup.
| Espresso | Drip Coffee |
|---|---|
| Concentrated, holds up under cream | Fades once layered, tastes watery |
| Traditional choice for this dessert | Workable if brewed double strength |
No espresso machine is fine. Instant espresso powder mixed with hot water gets you close enough for this.
6. Decide Whether to Include Raw Egg or Skip It
Traditional tiramisu uses raw egg yolks in the cream, which gives it a richer, more custard-like texture. Plenty of home versions skip it entirely, and the result is still good, just slightly lighter.
Use pasteurized eggs if you want the traditional richness.
Or skip eggs entirely and rely on whipped cream for structure.
Using raw unpasteurized eggs when serving kids or guests.
Adding eggs without adjusting the cream ratio to match.
The egg-free version is a safer default when you’re not sure who’s eating it.
7. Layer the Cup in the Right Order

Cream on the bottom looks nice through the glass, but it means the biscuit sits on top where it stays drier and firmer than the rest. Starting with the dipped ladyfinger gives a more balanced final texture.
Dipped ladyfinger pieces pressed into the bottom of the cup.
A spoonful of mascarpone cream spread to the edges of the glass.
Repeat once more, finishing with cream on top.
Push the cream all the way to the glass so there are no gaps showing along the side.
8. Chill Long Enough for the Layers to Set
Tiramisu straight from the counter tastes like separate ingredients sitting in a cup. Time in the fridge is what actually turns it into one dessert, as the biscuit softens and the cream firms up around it.
Overnight is better than four hours if you have the time to plan ahead.
9. Dust the Cocoa Right Before Serving, Not Before Chilling
Cocoa powder dusted on before the fridge absorbs moisture from the cream and turns patchy and damp. That clean, velvety cocoa top only happens if it goes on last.
💡 Quick Tip
Use a small fine mesh sieve and tap it gently rather than shaking, so the cocoa lands in an even layer.
Unsweetened cocoa works better than a sweetened drinking mix, which can taste flat against the cream.
10. Make an Alcohol-Free Version for Family Gatherings

Marsala or coffee liqueur adds depth to the coffee soak, but leaving it out doesn’t break the dessert. A few small adjustments keep the flavor from feeling thin without it.
What to use instead
This version works well for a family table where kids are eating the same dessert as everyone else.
11. Pick Cups That Show the Layers Clearly
A tiramisu cup looks like more work than it actually was once the layers are visible through the glass, which makes this an easy dessert to feel proud of. Opaque cups hide all of that effort.
| Glass Cups | Opaque Cups |
|---|---|
| Layers visible, looks intentional | Layers hidden until the first bite |
| Best for serving guests | Still fine for everyday, casual servings |
Small mason jars or clear plastic cups both work well and make the dessert feel a little more special.
12. Fix Mascarpone Cream That Turns Out Too Runny
Runny mascarpone cream usually means either the cheese was overworked or the whipped cream wasn’t whipped quite far enough before folding. This is fixable if you catch it before assembling the cups.
Chill the mixture for 15 minutes, then check the texture again.
Whip a small amount of extra cream separately and fold it in.
Whipping the whole mixture longer, which can break it further.
Assembling the cups anyway and hoping the fridge fixes it.
A short rest in the fridge before assembly solves this more often than people expect.
13. Prep These a Day Ahead for a Dinner Party

Tiramisu is one of the rare desserts that genuinely improves with a day of rest, since the flavors have more time to settle together. This makes it one of the easiest make-ahead options for entertaining.
Make it the day before. Tiramisu tastes better on day two, not worse, unlike most desserts.
Add the cocoa dusting right before guests arrive, not the night before, so it stays clean and fresh looking.
14. Add a Flavor Twist Without Losing the Classic Base
Once the basic method feels familiar, small flavor swaps keep the same dessert from feeling repeated across different occasions. The base recipe barely changes, just one or two key ingredients.
Pick one twist per batch rather than combining all three. Each one is strong enough to stand on its own.
15. Store Leftovers So the Ladyfingers Don’t Dissolve

Tiramisu holds up for a couple of days in the fridge, but the biscuit layer keeps softening the whole time, so texture does shift the longer it sits. Covering the cups properly slows that process down.
Past two days, the ladyfingers dissolve enough that the layers stop being distinct, so it’s best enjoyed within that window.
Conclusion
Tiramisu dessert cups take the intimidation out of a dessert that’s always felt a little out of reach for home cooks. No slicing, no worrying about clean layers in a serving dish, just individual portions that look composed from the start.
Once you’ve made a batch, most of the small details on this list become second nature: dip fast, chill long enough, dust the cocoa last. The rest is just picking a flavor twist or deciding how far ahead to make it.
Save this list for the next time you want a dessert that feels a little elegant without needing a full afternoon in the kitchen.